Showing posts with label free. Show all posts

9/14/12

Recipe: Easy Granola


Ingredients:

1 cup almonds
1 cup walnuts
Desired amount of soy nuts/ dehydrated cranberries, banana chips, other dried fruits (I used 1 cup of each)
2-3 cups old fashioned oats
2tsp cinnamon
1 tsp nutmeg
1/2 tsp allspice
1 c packed brown sugar
1/2-1 tsp salt (optional)
honey to clump - desired amount (I used about 1 cup)


(Measurements above are approximate. Add according to your own taste.) Add dry ingredients together in a large bowl. Stir together well.


Spray baking pan(s) with cooking oil. Fill with granola, but leave enough room to stir without spilling. I had to use 2 large casserole pans. Add desired amount of honey to mixture, enough to dampen and clump granola. Stir well.


Bake at 350 in 15 min intervals, stirring often. Its done when it is a light toasted brown. Granola will harden upon cooling. Don't burn it! Makes about a gallon or so, depending on how much you use.


(My first batch was a little too toasted.)

11/20/11

Pattern: Simple Crochet Armwarmers


What you will need:
  • Size I/9-5.50mm crochet hook
  • worsted weight yarn
  • tapestry needle


What you need to know:


Instructions:

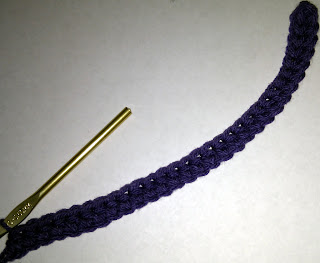
>>Chain 31.


>>Starting with the 2nd chain from your hook loop, HDC in each chain stitch until you reach the end of the chain. (30 HDC total per row)


>>Chain 1 & turn your work.

**You will be working in the back loops the entire project from this point.

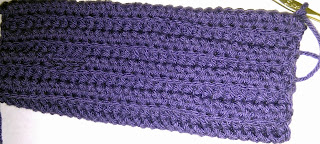
>>Working in the back loops only [BLO], continue to work 3 more rows. (4 rows total, 30HDC per row) 


>>Chain 1 at the start of your 5th row. HDC in the next 20 stitches. Chain 4.


>>Skip the next 4 stitches. HDC in 5th stitch. [pictured below] & finish crocheting your row.


>>Continue working 11  more rows of HDC in BLO until you have a total of 16 rows. 


>>Fold your work in half to line up your last crochet row with your foundation chain. 


**This is where we will seam the gloves together with a Slip Stitch. 

>>Insert hook into first foundation chain & through the back loop of the first crochet & secure together with a slip stitch.


(Its kind of difficult to see, but that is the first slip stitch of this seam)

>>Continue to seam this together with a slip stitch all the way to the end of the row. Fasten with a chain stitch.

(This seam is nearly invisible on this side, but when you turn it inside out, you can't even tell it's there!)

>>Cut your yarn and sew in your tails with the tapestry needle. Turn inside out so that seam is on the inside of the armwarmer.

>>Try it on!


(Repeat for matching arm warmer)

Once you get the hang of this pattern it is so easy. It's simple & easy to remember. You can do all kinds of extras to spice these up like a border or lace around the edges or maybe even add some stripes!

If you try making your own pair, send me photos of your finished product. I would love to see them!

10/4/11

FREE Yoda LOOKALIKE Ear Pattern!

Please Note:
This is my own personal pattern that I created. Please do not copy, manipulate or sell my pattern. Feel free to sell your item after creating it. Do not post this pattern to any other site - Please give credit to me when sharing this pattern.

>>>>>>>>>>>>>>>>>>>>>>>>>>>>>>


What you will need:
Crochet hook size h/8 or 5.00 MM
Crochet hook size G/6 or 4.25 MM
4 Ply Worsted weight yarn


Familiarity of all basic crochet stitches listed below.

Terms Used:
CH: Chain
ST: Stitch
SS: Slip Stitch
SC: Single Crochet
HDC: Half Double Crochet
DC: Double Crochet
TC: Triple (Treble) Crochet

Instructions:

Start using your size H crochet hook.
Chain 8
HDC in the next 6 ST

ALL IN 7th ST, HDC x4
(turn work to prepare to crochet down opposite side)


1 HDC in between each stitch for next 7 ST.


CH 1
Turn

1 HDC in each ST (in between/under loops for entire pattern for stiffness) for 6 ST.


Work 2 HDC in each of the next 4 ST (8 Total)

Work 1 HDC in each ST for remaining 7 ST.


CH1
Turn

1 HDC for 7 ST

2 HDC in each ST in the next 3 ST


ALL IN THE NEXT STITCH:
1 DC, 2 TC, 1 DC


2 HDC in each ST in the next 3 ST

1 HDC in each ST for the next 7 ST


CH1
Turn
HDC all the way around the ear (30 ST total)


CH1
Turn
Change crochet hook to size G or 4.25 mm.

SC in each stitch for the next 15 ST.

2 SC in next stitch

1 SC in each stitch for the remaining 14 ST

CH1
Turn
this round will cause the edge of the ear to begin to roll up. This is a good thing.
1 SC in each stitch for 14 ST


ALL IN THE NEXT STITCH:
1 HDC, 1 DC, 1 HDC


1 SC in the last 16 ST


CH 1
Turn to where the point of the ear is pointing down and the flat side is up towards you.


Work 1 HDC in between each row of previous crochets, about 10 ST. (It doesn't have to be too exact, because we are only using these crochets to draw the ear in a bit.)


At the end of the row, CH 1, and connect to your beginning row with a SS.


Ch1 to secure. Leave a long tail for sewing to hat. cut string, and pull loop out to secure ear closed and form your tail.

If you have any frayed edges, sew them in before we crunch up the ear.

Thread tail into your tapestry needle.
Weave needle in between each of the 10 HDC's you made in the bottom row.

Pull yarn through -- Pull tight to achieve desired gathering of the ear.

Knot to secure. Leave tail to sew onto hat.

Repeat to make your 2nd ear.

Attach them in the desired location on your preferred hat style.


Feel free to add more or less stitches into your foundation chain and throughout the pattern to adjust size. This pattern is specifically to be used for a baby sized hat, about 3-6 months.