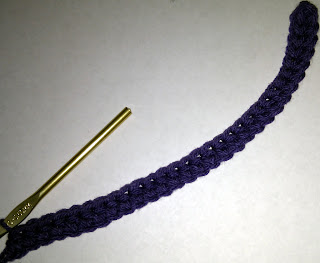
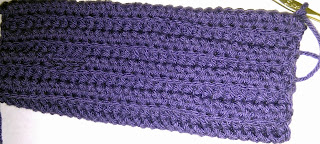
What you will need:
- Size I/9-5.50mm crochet hook
- worsted weight yarn
- tapestry needle
What you need to know:
- HDC- Half Double Crochet
- SS- Slip Stitch
- BLO- Back loop only
Instructions:
>>Chain 31.
>>Starting with the 2nd chain from your hook loop, HDC in each chain stitch until you reach the end of the chain. (30 HDC total per row)
>>Chain 1 & turn your work.
**You will be working in the back loops the entire project from this point.
>>Working in the back loops only [BLO], continue to work 3 more rows. (4 rows total, 30HDC per row)
>>Chain 1 at the start of your 5th row. HDC in the next 20 stitches. Chain 4.
>>Skip the next 4 stitches. HDC in 5th stitch. [pictured below] & finish crocheting your row.
>>Continue working 11 more rows of HDC in BLO until you have a total of 16 rows.
>>Fold your work in half to line up your last crochet row with your foundation chain.
**This is where we will seam the gloves together with a Slip Stitch.
>>Insert hook into first foundation chain & through the back loop of the first crochet & secure together with a slip stitch.
(Its kind of difficult to see, but that is the first slip stitch of this seam)
>>Continue to seam this together with a slip stitch all the way to the end of the row. Fasten with a chain stitch.
(This seam is nearly invisible on this side, but when you turn it inside out, you can't even tell it's there!)
>>Cut your yarn and sew in your tails with the tapestry needle. Turn inside out so that seam is on the inside of the armwarmer.
>>Try it on!
(Repeat for matching arm warmer)
Once you get the hang of this pattern it is so easy. It's simple & easy to remember. You can do all kinds of extras to spice these up like a border or lace around the edges or maybe even add some stripes!
If you try making your own pair, send me photos of your finished product. I would love to see them!


This makes me want to learn how to crochet.
ReplyDeleteBrooke,
ReplyDeleteWonderful tutorial! It's easy to follow and makes crochet look easy -- two very important aspects of a tutorial. :)
I love the arm warmers. That's a great idea for this time of year, for sure.
-- Sarah, visiting from Comment Love.
Ooo, I haven't learned to rib yet crocheting. I usually stick to knitting when I want a rib stitch, but I've always been interested in the crochet, too.
ReplyDeleteThank you all for visiting! <3
ReplyDelete@sunny: I love to crochet. Once I wrapped my head around it I became addicted. I dream about it sometimes! LOL. I highly suggest learning if you are interested in it. Youtube makes it super easy.
@saturday sequins: Thank you! I was hoping that the pattern would be simple and easy to read.
@sonya: I'm not sure if this is the "official" way to achieve a rib effect on a crochet piece, but it does give a slight rib look [the photos don't really capture it well. probably a bad choice in yarn color], but I mostly use the BLO tactic when I want something stretchy and soft, with a little bit extra visual interest.
Oh my gosh, I wish I would have found your blog a along time ago! I have been doing the same stitches for so long now, and every time I want to make something other than a scarf I have to wing it... You saved my life!
ReplyDelete:) I'm your newest follower, such a cute blog. :D
Ryan @ Thismustbetheplaceryan
Really great tutorial!
ReplyDeleteBrooke, just found you via ftlob. I've been looking for a way to expand my knitting beyond and scarf and you've left me inspired! Can't wait to come back and learn more. I'm your newest follower.
ReplyDeleteHappy seeing beautiful!
Oh my gosh, I LOVE this! You are an amazing crocheter! Thanks so much for sharing it and linking it up to my blog! Hope to see you link up again tomorrow!
ReplyDeleteThank you! I try to link up wherever I can, so I will be checking back tomorrow. <3
ReplyDelete