8/7/12

Projects in Progress

Here's a little sneak peak at some projects we have been working on.

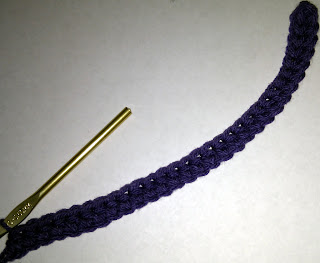
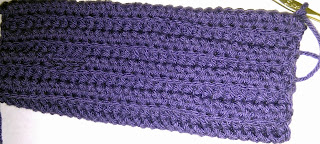
This is going to be a pair of cotton armwarmers that will lace up, similar to the dance socks I posted about here. I think they will be super cute!


This is a headband/earwarmer made of 80% Peruvian Highland Wool and 20% Donegal Tweed. The yarn is absolutely gorgeous and soft. I love the way it looks with the buttons! The best part is that it will fit any size head, as you can just button it anywhere it feels comfortable for you.

[in progress. i just love the flecks of tweed!]


These items will be available in the shop some time next week.


8/1/12

new stuff and whatnot

We've been hard at work sketching out new ideas, writing out patterns, throwing out bad ideas and taking photos of our own feet!

Finally we have a couple of new things in our shop.

First, here is a photo of our lace up toeless socks. Check out the listing here!


I really love these. I think they are just so adorable and just a little bit sexy, too!


These are the button up toeless socks. Check out the listing here!


I especially love these because you can button them anywhere to have a snuggly fit. They are really warm and both pairs are machine washable!


We are still working on more designs of toeless socks [because I am obsessed with them now!] and we're also working on adding a variety of items like boot cuffs, arm warmers, leg warmers, scarves, hats and electronic cozies. Plus, we will be posting photos of our items in progress so you can see our items come together!

11/20/11

Pattern: Simple Crochet Armwarmers


What you will need:
  • Size I/9-5.50mm crochet hook
  • worsted weight yarn
  • tapestry needle


What you need to know:


Instructions:

>>Chain 31.


>>Starting with the 2nd chain from your hook loop, HDC in each chain stitch until you reach the end of the chain. (30 HDC total per row)


>>Chain 1 & turn your work.

**You will be working in the back loops the entire project from this point.

>>Working in the back loops only [BLO], continue to work 3 more rows. (4 rows total, 30HDC per row) 


>>Chain 1 at the start of your 5th row. HDC in the next 20 stitches. Chain 4.


>>Skip the next 4 stitches. HDC in 5th stitch. [pictured below] & finish crocheting your row.


>>Continue working 11  more rows of HDC in BLO until you have a total of 16 rows. 


>>Fold your work in half to line up your last crochet row with your foundation chain. 


**This is where we will seam the gloves together with a Slip Stitch. 

>>Insert hook into first foundation chain & through the back loop of the first crochet & secure together with a slip stitch.


(Its kind of difficult to see, but that is the first slip stitch of this seam)

>>Continue to seam this together with a slip stitch all the way to the end of the row. Fasten with a chain stitch.

(This seam is nearly invisible on this side, but when you turn it inside out, you can't even tell it's there!)

>>Cut your yarn and sew in your tails with the tapestry needle. Turn inside out so that seam is on the inside of the armwarmer.

>>Try it on!


(Repeat for matching arm warmer)

Once you get the hang of this pattern it is so easy. It's simple & easy to remember. You can do all kinds of extras to spice these up like a border or lace around the edges or maybe even add some stripes!

If you try making your own pair, send me photos of your finished product. I would love to see them!

11/19/11

Working in the back loops

Working in the back loops is a useful tactic when you want to create an item with a little bit of ribbing detail. Not only does this make your work look more interesting but it gives your item a lot of useful stretch and softness.


Where exactly is the back loop?
Once you know where to look, the back loop is super easy to identify and breeze to work in.

Look at the top of your row of crochet. There is a "<" shape at the top of each individual crochet. When you are holding your work as if you are working right to left, the back loop is the farthest leg of the loop from your body.


How to work it:
Working into the back loop is super easy. Insert your hook into the "<" shape, through the middle [in between each leg]. Push your hook under the back loop and work your crochet from there!


If you are working your crochets in the back loops, you will start to notice a subtle ribbing of your item. 


It's that simple!

If you have any questions, feel free to email me & ask!