11/20/11

Pattern: Simple Crochet Armwarmers


What you will need:
  • Size I/9-5.50mm crochet hook
  • worsted weight yarn
  • tapestry needle


What you need to know:


Instructions:

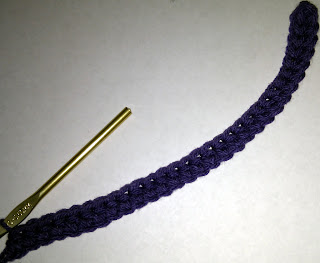
>>Chain 31.


>>Starting with the 2nd chain from your hook loop, HDC in each chain stitch until you reach the end of the chain. (30 HDC total per row)


>>Chain 1 & turn your work.

**You will be working in the back loops the entire project from this point.

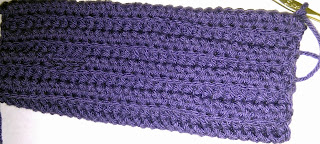
>>Working in the back loops only [BLO], continue to work 3 more rows. (4 rows total, 30HDC per row) 


>>Chain 1 at the start of your 5th row. HDC in the next 20 stitches. Chain 4.


>>Skip the next 4 stitches. HDC in 5th stitch. [pictured below] & finish crocheting your row.


>>Continue working 11  more rows of HDC in BLO until you have a total of 16 rows. 


>>Fold your work in half to line up your last crochet row with your foundation chain. 


**This is where we will seam the gloves together with a Slip Stitch. 

>>Insert hook into first foundation chain & through the back loop of the first crochet & secure together with a slip stitch.


(Its kind of difficult to see, but that is the first slip stitch of this seam)

>>Continue to seam this together with a slip stitch all the way to the end of the row. Fasten with a chain stitch.

(This seam is nearly invisible on this side, but when you turn it inside out, you can't even tell it's there!)

>>Cut your yarn and sew in your tails with the tapestry needle. Turn inside out so that seam is on the inside of the armwarmer.

>>Try it on!


(Repeat for matching arm warmer)

Once you get the hang of this pattern it is so easy. It's simple & easy to remember. You can do all kinds of extras to spice these up like a border or lace around the edges or maybe even add some stripes!

If you try making your own pair, send me photos of your finished product. I would love to see them!

11/19/11

Working in the back loops

Working in the back loops is a useful tactic when you want to create an item with a little bit of ribbing detail. Not only does this make your work look more interesting but it gives your item a lot of useful stretch and softness.


Where exactly is the back loop?
Once you know where to look, the back loop is super easy to identify and breeze to work in.

Look at the top of your row of crochet. There is a "<" shape at the top of each individual crochet. When you are holding your work as if you are working right to left, the back loop is the farthest leg of the loop from your body.


How to work it:
Working into the back loop is super easy. Insert your hook into the "<" shape, through the middle [in between each leg]. Push your hook under the back loop and work your crochet from there!


If you are working your crochets in the back loops, you will start to notice a subtle ribbing of your item. 


It's that simple!

If you have any questions, feel free to email me & ask!


11/7/11

Recipe: Pulled BBQ Pork!

This week I made some awesome Pulled BBQ Pork. Its a really easy recipe and tastes so yummy! Here is my exact recipe!


Ingredients:

  • 3-4 pounds of pork. [I used boneless pork shoulder ribs]
  • 16 oz your favorite BBQ sauce [I use Montgomery Inn]
  • 1 medium onion- diced
  • 1 clove garlic- minced/pressed
  • 3 tablespoon butter
  • 1 cup beef or chicken broth -OR- 1 cup hot water & 1 bouillon cube
  • 4 cups water
  • salt & pepper
Directions

1] Add diced onion, minced garlic, butter and broth into your slow cooker. Turn heat to high.

2] Turn pork onto clean cutting board. Generously salt & pepper both sides of the meat.


3] Separate meat and put into the slow cooker. Add about 4 cups of water, or just enough to fully submerge the pork. 


4] Cook on high for 8-10 hours, or until the meat is tender and falls apart easily.

5] Preheat oven to 350°F. Ladle the pork [& onions if you want!] out into a deep pan. Using a fork, shred the pork away from fatty pieces [there shouldn't be much fat, cooking it for so long really reduces it to next to nothing]. Discard unwanted fat.

6] Mix in BBQ sauce. Add as much or as little as you like. I use 16 oz per 3 pounds of meat.

7] Place in oven and bake for 30-40 minutes, or until sauce is bubbling hot.


8] Serve warm on an awesome bun!

I really hope you guys try this recipe. Sorry for the lack of quality pictures. I will add more the next time I make this! <3


11/3/11

Twix Copycat Recipe

Yesterday I made some amazing cookies that were inspired by Twix candies! I got the recipe here, but I made a few changes, so I'll post my exact recipe on here.

Ingredients:
Cookie layer:
2 Sticks of unsalted butter (softened)
1/2 teaspoon salt
1 cup confectioner's sugar
2 teaspoon vanilla extract
2 cup all purpose flour

Caramel layer:
2 cup caramel pieces (I used Kraft traditional Caramels)
3 tablespoons heavy cream

Chocolate layer:
3 cups milk chocolate, or dark chocolate (I used Hershey's Milk Chocolate chips)

Instructions:
>>Preheat the oven to 300°F
>>Spray 9x13" pan with cooking spray or line with parchment paper
>>In a medium bowl, beat together your softened butter, sugar, salt & vanilla. Once mixed well, add flour and continue to beat on medium speed. Dough will be stiff.

>>Using lightly floured (& clean!!) fingertips, press the dough evenly into the pan.
>>Poke holes in the dough with a fork to let air bubbles escape while baking.

>>Bake 35-45 mins or until edges are golden brown.
>>Remove from oven and immediately run a knife around the edges of the pan to loosen & set aside to cool. (I put mine in the fridge)

>>Melt caramel and heavy cream over low heat, making sure you don't burn. These take awhile to melt, so be patient.


>>When caramel is melted and creamy, remove from heat and immediately pour over the cookie layer and smooth it out evenly. You have to do this fast, because the caramel really starts stiffening up pretty quickly.


>>Place into the fridge or freezer to cool quickly and firm up.
>>Melt your chocolate chips in a double boiler, or on very low heat. Don't let the chocolate burn! It melts very fast.(if its too thick for your taste, add a bit of butter or heavy cream to thin it just a little)


>>Pour chocolate over hardened caramel cookie layers and chill until hard.

>>Enjoy! These are sooo yummy. :D


>>Keeps best when stored in the fridge.

I really hope you try this recipe. They were so much better than I had even imagined!

Also, don't forget to enter my giveaway! You can enter once, or up to 6 times! I'm offering my favorite items from my Etsy shop to giveaway, so don't miss out!